这几天换了工作,事情一下子多了起来,前公司十分给力的只给了我400多的应付职工薪酬,心态炸了。
** CAS - Central Authentication Service**
CAS是一个单点登录框架,通俗理解为一个应用登录了,其他被授权的应用不用再登录。
比如,A系统登录了之后,B系统就可以跳过登录,转而进入系统内。于是问题来了:在实现cas单点登录之前,我首先要实现两个系统的多数据源配置 ,把登录相关表设为一个共有的数据源。关于多数据源配置我另起了一篇○| ̄|_
事实上,使用cas单点登录时,相当于跳过原项目的登录过程,把登录的功能转嫁给cas服务器 来实现。
1.下载 由于cas是开源的,所以直接在官网 下载源码就可以。
其实只需要用到一个包,就可以实现简单的单点登录:cas-server-core,并且这个包下源码的编译文件最后是要放到应用服务器里面的。
2.对cas-server-core 源码进行修改 由于不同的项目都有着自己的密码加密规则,所以需要对cas-server-core包下的源码进行修改:
上代码:
修改\webapps\cas\WEB-INF下的deployerConfigContext.xml
** 替换primaryAuthenticationHandler 的 bean**
1
2
3
4
5
<bean id="primaryAuthenticationHandler" class="com.distinct.cas.jdbc.QueryDatabaseAuthenticationHandler" p:dataSource-ref="dataSource" p:passwordEncoder-ref="passwordEncoder" p:sql="select password from sys_user where username=? and status = 1" />
** 新增**
1
2
3
4
5
6
7
8
9
10
11
12
13
<bean id="dataSource" class="org.springframework.jdbc.datasource.DriverManagerDataSource" > <property name="driverClassName" value="com.mysql.jdbc.Driver"/> <property name="url" value="jdbc:mysql://192.168.0.107:3306/sys_blueroc_db?autoReconnect=true"/> <property name="username" value="root"/> <property name="password" value="root"/> </bean> <bean id="passwordEncoder" class="org.jasig.cas.authentication.handler.DefaultPasswordEncoder" c:encodingAlgorithm="MD5" p:characterEncoding="UTF-8" />
bean dataSource主要是定义连接用户表数据库的配置,QueryDatabaseAuthenticationHandler类就是对用户校验的处理类,在server-core 源码包中新增:
1
2
3
4
5
6
7
8
9
10
11
12
13
14
15
16
17
18
19
20
21
22
23
24
25
26
27
28
29
30
31
32
33
34
35
36
37
38
39
40
41
42
43
44
45
46
47
48
49
50
51
52
53
54
55
56
57
58
59
60
61
62
63
64
65
66
67
68
69
70
71
72
73
74
75
76
77
78
79
package com.distinct.cas.jdbc; import org.jasig.cas.authentication.HandlerResult; import org.jasig.cas.authentication.PreventedException; import org.jasig.cas.authentication.UsernamePasswordCredential; import org.jasig.cas.authentication.handler.support.AbstractUsernamePasswordAuthenticationHandler; import org.jasig.cas.authentication.principal.SimplePrincipal; import org.slf4j.Logger; import org.slf4j.LoggerFactory; import org.springframework.beans.factory.annotation.Autowired; import org.springframework.jdbc.core.JdbcTemplate; import org.springframework.jdbc.datasource.DriverManagerDataSource; import org.springframework.stereotype.Component; import javax.security.auth.login.FailedLoginException; import java.security.GeneralSecurityException; /** * @author sunjx * @date 2018/5/28 16:23 **/ @Component(value = "primaryAuthenticationHandler") public class QueryDatabaseAuthenticationHandler extends AbstractUsernamePasswordAuthenticationHandler { private Logger logger = LoggerFactory.getLogger(QueryDatabaseAuthenticationHandler.class); @Autowired private DriverManagerDataSource dataSource; // 注入deployerConfigContext.xml 的查询sql @Autowired private String sql; /** * Authenticates a username/password credential by an arbitrary strategy. * * @param transformedCredential the credential object bearing the transformed username and password. * @return HandlerResult resolved from credential on authentication success or null if no principal could be resolved * from the credential. * @throws GeneralSecurityException On authentication failure. * @throws PreventedException On the indeterminate case when authentication is prevented. */ protected final HandlerResult authenticateUsernamePasswordInternal(final UsernamePasswordCredential transformedCredential) throws GeneralSecurityException, PreventedException { //UsernamePasswordCredential参数包含了前台页面输入的用户信息 String username = getPrincipalNameTransformer().transform(transformedCredential.getUsername()); String password = transformedCredential.getPassword(); //认证用户名和密码是否正确 final String encryptedPassword = this.getPasswordEncoder().encode(password,username); logger.info("pwd:"+encryptedPassword + "////////////////////////////////////"); System.out.println("pwd:"+encryptedPassword + "////////////////////////////////////"); try { JdbcTemplate jdbcTemplate = new JdbcTemplate(dataSource); if(encryptedPassword.equals(jdbcTemplate.queryForObject(sql, new Object[]{username},String.class))){ return createHandlerResult(transformedCredential, new SimplePrincipal(username), null); } }catch (Exception e){ e.printStackTrace(); } throw new FailedLoginException(); } public void setDataSource(DriverManagerDataSource dataSource) { this.dataSource = dataSource; } public DriverManagerDataSource getDataSource() { return dataSource; } public void setSql(String sql) { this.sql = sql; } public String getSql() { return sql; } }
服务端创建安全证书:
cmd 控制台进入某给文件路径(同linux)
生成证书
在客户端shiroConfig中定义cas的服务器路径
1
2
3
4
5
6
7
8
9
10
11
12
13
14
15
16
17
18
19
20
21
22
23
24
25
26
27
28
29
30
31
32
33
34
35
36
37
38
39
40
41
42
43
44
45
46
47
48
49
50
51
52
53
54
55
56
57
58
59
60
61
62
63
64
65
66
67
68
69
70
71
72
73
74
75
76
77
78
79
80
81
82
83
84
85
86
87
88
89
90
91
92
93
94
95
96
97
98
99
100
101
102
103
104
105
106
107
108
109
110
111
112
113
114
115
116
117
118
119
120
121
122
123
124
125
126
127
128
129
130
131
132
133
134
135
136
137
138
139
140
141
142
143
144
145
146
147
148
149
150
151
152
153
154
155
156
157
158
159
160
161
162
163
164
165
public static final String loginUrl = "http://localhost:8443/cas/login?service=你的项目路径"; /** * 注册单点登出filter * @return */ @Bean public FilterRegistrationBean singleSignOutFilter(){ FilterRegistrationBean bean = new FilterRegistrationBean(); bean.setName("singleSignOutFilter"); bean.setFilter(new SingleSignOutFilter()); bean.addUrlPatterns("/*"); bean.setEnabled(true); //bean.setOrder(Ordered.HIGHEST_PRECEDENCE); return bean; } /** * 定义casfilter继承`org.apache.shiro.cas.CasFilter` * * @return * @author * @create */ @Bean(name = "casFilter") public CasFilter getCasFilter() { MyCasFilter casFilter = new MyCasFilter(); casFilter.setName("casFilter"); casFilter.setEnabled(true); casFilter.setLoginUrl(casLoginUrl); casFilter.setSuccessUrl(loginSuccessUrl); // 登录失败后跳转的URL,也就是 Shiro 执行 CasRealm 的 doGetAuthenticationInfo 方法向CasServer验证tiket casFilter.setFailureUrl(loginUrl);// 我们选择认证失败后再打开登录页面 return casFilter; } /** * 该过滤器负责用户的认证工作,必须启用它 * @return */ @Bean public FilterRegistrationBean casAuthenticationFilter() { FilterRegistrationBean filterRegistrationBean = new FilterRegistrationBean(); filterRegistrationBean.setFilter(new AuthenticationFilter()); // AuthenticationFilter t = new AuthenticationFilter(); filterRegistrationBean.addUrlPatterns("/*"); filterRegistrationBean.addInitParameter("casServerLoginUrl",ShiroConfig.casLoginUrl); //cas 服务器登录 filterRegistrationBean.addInitParameter("serverName",ShiroConfig.shiroServerUrlPrefix); // 客户端服务器地址 return filterRegistrationBean; } /** * 该过滤器负责对Ticket的校验工作,必须启用它 * @return */ @Bean public FilterRegistrationBean casFilterRegistrationBean() { FilterRegistrationBean filterRegistrationBean = new FilterRegistrationBean(); filterRegistrationBean.addUrlPatterns("/*"); filterRegistrationBean.setFilter(new Cas20ProxyReceivingTicketValidationFilter()); filterRegistrationBean.addInitParameter("serverName",ShiroConfig.shiroServerUrlPrefix); // cas 服务器地址 filterRegistrationBean.addInitParameter("casServerUrlPrefix",ShiroConfig.casServerUrlPrefix); // 客户端服务器地址 return filterRegistrationBean; } /** * 该过滤器负责实现HttpServletRequest请求的包裹, * 比如允许开发者通过HttpServletRequest的getRemoteUser()方法获得SSO登录用户的登录名 * 可选配置 * @return */ @Bean public FilterRegistrationBean httpServletRequestWrapperFilter() { FilterRegistrationBean filterRegistrationBean = new FilterRegistrationBean(); filterRegistrationBean.addUrlPatterns("/*"); filterRegistrationBean.setFilter(new HttpServletRequestWrapperFilter()); return filterRegistrationBean; } /** * 该过滤器使得开发者可以通过org.jasig.cas.client.util.AssertionHolder来获取用户的登录名。 * AssertionHolder.getAssertion().getPrincipal().getName()。 * @return */ @Bean public FilterRegistrationBean assertionThreadLocalFilter() { FilterRegistrationBean filterRegistrationBean = new FilterRegistrationBean(); filterRegistrationBean.addUrlPatterns("/*"); filterRegistrationBean.setFilter(new AssertionThreadLocalFilter()); return filterRegistrationBean; } /** * 注册单点登出listener * @return */ @Bean public ServletListenerRegistrationBean singleSignOutHttpSessionListener(){ ServletListenerRegistrationBean bean = new ServletListenerRegistrationBean(); bean.setListener(new SingleSignOutHttpSessionListener()); // bean.setName(""); //默认为bean name bean.setEnabled(true); //bean.setOrder(Ordered.HIGHEST_PRECEDENCE); //设置优先级 return bean; } // 然后声明shiro 的cas登录的realm @Bean public MyShiroCasRealm myShiroCasRealm(EhCacheManager cacheManager) { MyShiroCasRealm realm = new MyShiroCasRealm (); realm.setCacheManager(cacheManager); return realm; } // 在返回SecurityManager的bean内加入MyShiroCasRealm: @Bean public SecurityManager securityManager() { DefaultWebSecurityManager securityManager = new DefaultWebSecurityManager(); Collection collection = new ArrayList(); ((ArrayList) collection).add(userRealm()); ((ArrayList) collection).add(myShiroCasRealm(ehCacheManager())); //设置realm. securityManager.setRealms(collection); // 自定义缓存实现 使用redis if (Constant.CACHE_TYPE_REDIS.equals(cacheType)) { securityManager.setCacheManager(cacheManager()); } else { securityManager.setCacheManager(ehCacheManager()); } securityManager.setSessionManager(sessionManager()); return securityManager; } <!-- 最后,加入上面已经声明的过滤器 --> @Bean ShiroFilterFactoryBean shiroFilterFactoryBean(SecurityManager securityManager) { Map<String, Filter> filters = new HashMap<>(); filters.put("casFilter", getCasFilter()); filters.put("authenticationFilter", casAuthenticationFilter().getFilter()); filters.put("cas20ProxyReceivingTicketValidationFilter", casFilterRegistrationBean().getFilter()); filters.put("httpServletRequestWrapperFilter", httpServletRequestWrapperFilter().getFilter()); filters.put("assertionThreadLocalFilter", assertionThreadLocalFilter().getFilter()); ShiroFilterFactoryBean shiroFilterFactoryBean = new ShiroFilterFactoryBean(); shiroFilterFactoryBean.setSecurityManager(securityManager); shiroFilterFactoryBean.setLoginUrl(loginUrl); shiroFilterFactoryBean.setSuccessUrl(loginSuccessUrl); shiroFilterFactoryBean.setUnauthorizedUrl(unauthorizedUrl); shiroFilterFactoryBean.setFilters(filters); LinkedHashMap<String, String> filterChainDefinitionMap = new LinkedHashMap<>(); filterChainDefinitionMap.put("/css/**", "anon"); filterChainDefinitionMap.put("/api/**", "anon"); filterChainDefinitionMap.put("/**", "authc"); shiroFilterFactoryBean.setFilterChainDefinitionMap(filterChainDefinitionMap); return shiroFilterFactoryBean; }
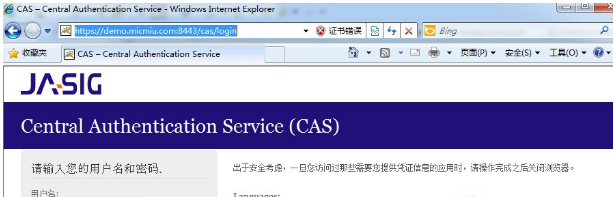
如果访问http://localhost:8443/cas/login 出现如下页面,则证明部署成功了。
2.cas 修改登录样式 假如,你觉得上面的登录样式太丑了(事实上的确很丑..),那我们可以去修改一下登录的样式:
算了,贴个链接吧,我太懒了QAQ
cas4.2.7定制登录页面样式(并且让页面默认使用中文提示)